
Most of the things I learn on Linux, I’ve learned to play around with as virtual machines on my Windows Desktop. I’m putting this here for me to remember my steps in the future, but in case anyone else finds this helpful, yay, internet!
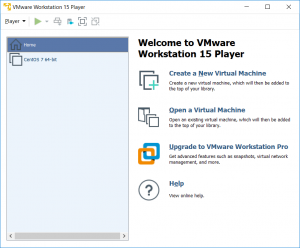
First of all, I’m a fan of VMware Workstation Player. Their website says: “The free version is available for non-commercial, personal and home use.” When you do pay for it (once you start making money or are working somewhere that you need it), it’s only $149.99 (as of 8/22/2019 when I checked)
https://www.vmware.com/products/workstation-player/workstation-player-evaluation.html
I used to use VirtualBox, but their licensing restrictions are slightly daunting. Installing the VMware workstation isn’t something I am going into here, it’s like installing any other basic software on your desktop, so I won’t go over that here. Once I have the software running, then I do the following:
Create New Virtual Machine
Then I download the Minimal ISO from CentOS: https://www.centos.org/download/
Direct link here: http://isoredirect.centos.org/centos/7/isos/x86_64/CentOS-7-x86_64-Minimal-1810.iso
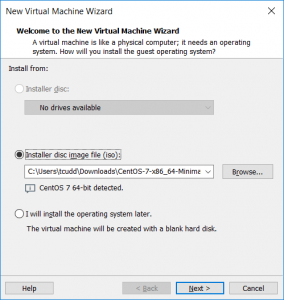
I always start with the minimal, but I never quite know what I’m going to use each image for until I start playing around with it.
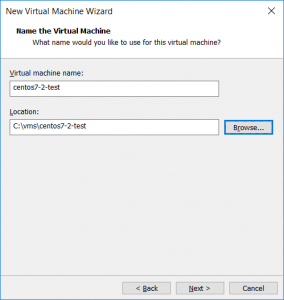
Once you hit next, you can name the VM and find the location where you want the disk and system to live.
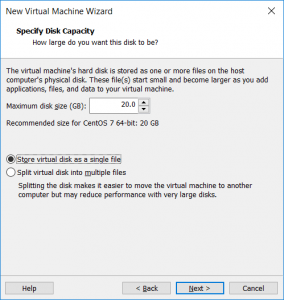
I usually just do 1 file for the disk as I’m more concerned about performance on my system rather than portability of the files.
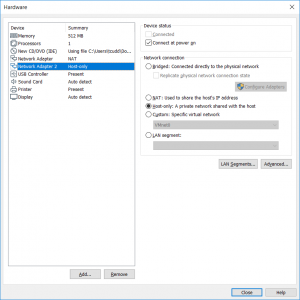
Once you click next, I recommend “customize hardware” to get your systems specifications in order. I have a laptop with 16GB RAM and usually have my primary Linux VM use up 2 GB RAM. For systems that I test single applications and behaviors, or have them be short-lived for other reasons, I’ll either do 1GB RAM or 512MB. I also create a second network adapter, and configure it to be “Host-only”. I do this so I can set static IP addresses on my VM’s on the host network and then put in host file entries on my Windows machine to make addressing internal website testing simpler. I leave all other hardware as default.
Once I’m done with the “Customize Hardware” screen, I finish and make sure “Power on after creation” is checked, and then “Finish”.
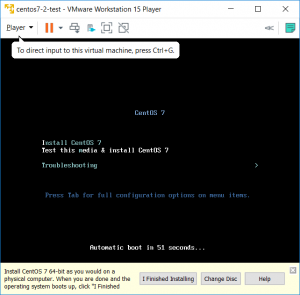
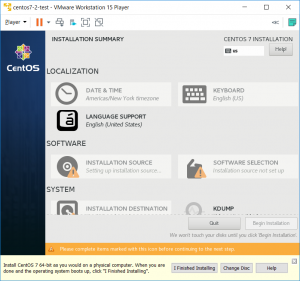
Once CentOS installation starts to go through its process, you’ll set the keyboard and language. At the next screen, I recommend setting “Date & Time” under Localization, then clicking on “Installation Destination” Under the System section and just clicking “Done” to keep all the defaults. Under “Network & Host Name” turn on the network devices so they get IP addresses. The second adapter you can either set to have a static IP or configure it after you boot up and have the OS installed. Change the Hostname to an easy to remember name that you’ll put in a hosts file entry, Click “Done”. At this point I begin installation. The next screen will ask to set a root password and a default account (which you can make an admin account).
Once the installation is done, you are now able to see the machine started up in the VMware player console and log into it with the username and password you set up during installation! SSH should be set up, but you may need to configure the network-script with a static IP to SSH to it. If you checked the box to make your user an admin, you should now be able to sudo to root.
Example:
On the VM
[tcudd@centos7 ~]$ sudo cat /etc/sysconfig/network-scripts/ifcfg-ens34

TYPE=Ethernet

BOOTPROTO=static

NAME=ens34

DEVICE=ens34

ONBOOT=yes

PREFIX=24

IPADDR=192.168.127.99

ZONE=public
On the host:
tcudd@tcudd5-pc:~$ grep centos /mnt/c/Windows/system32/drivers/etc/hosts

192.168.127.99 centos7 c7
Once I do that, two things are to my benefit here: my username matches between my PC and my VM, so if I set up SSH keys all I have to do is type “ssh c7” in my Linux for Windows subsystem for Linux to connect to my machine.
Best practice examples found here: